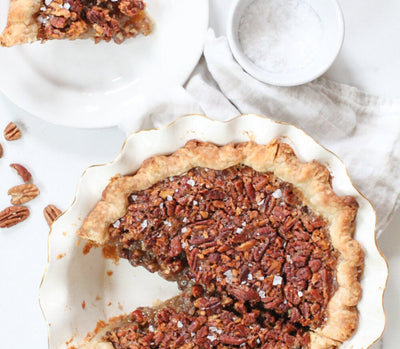
In this blog post, I’m going to take you on the three to four week journey of the creation of a single piece of pottery - our ever popular size C bowl. This versatile piece has become so popular for its range of use and its medium size. It is small enough to fit on an accent table but large enough to stand alone on a coffee table…just the right size for accessorizing your bookshelf and perfect for holding your favorite fruit or veggies on your kitchen counter. I love this size bowl and below I’m going to walk you through what a squishy wad of clay goes through to become a graceful, classic, heirloom and collectable piece of pottery.
It still amazes me how much each of these pieces has to go through to get to their final finished state. Before each piece is finished, it is picked up at least twenty times during the production process. More than five pairs of eyes examine them during the various steps to make sure they meet our very high standards. If for some reason one of our pieces does not meet our standards, it gets put into our “seconds” pile that goes on sale every so often. These pieces are still functional, beautiful, and useful but might have a slight imperfection that could not be sold for full price - so we sell these at deep discounts. More on that later!

First, we take raw, wet clay and roll it out using a mechanical device called a slab roller. Think of it as a giant cookie dough pin. This device rolls the clay out into an even thickness. The clay is then cut to size, and left to “set up” or dry out for about 30 minutes to overnight, depending on the humidity in the air. Next, stamping.

We stamp the bottom of our work with what potter’s call a “Maker’s Mark” - it’s more than a logo; it’s a potter’s signature mark that indicates this piece was made by hand, is authentic, and includes the size - so a letter “C” as well.

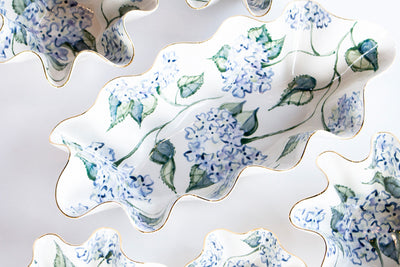
After the clay has stiffened just enough to leave its original “squishy” state, we slump it into one of our bowl forms and create the waves. Each size bowl has a specific number of waves. The C size bowl has nine waves.

After it’s formed, the clay is set out to dry for about two days, again, depending on the weather. Once it has fully dried, the greenware C bowl is now ready for smoothing by hand. We use a sponge to smooth out any fingernail marks, scratches, or dents that might have occurred in the making process. This is a tedious and high pressure task, as the piece is at its most breakable at this stage.


After the bowl has dried, it goes into the kiln for the first firing - bisque - which takes around 24-36 hours to fire. This firing is essential to help strengthen and harden the clay and remove moisture, and prepares the piece for the next step: Glazing.


Once the piece has cooled from bisque firing, it is ready to be glazed. About 24 hours before glazing, we washed each piece of pottery to remove excess dust that might have settled on it during making or firing. Before it can be glazed, it has to dry completely. Once it is dry, it is ready to accept our glaze. Our glaze is hand-applied by either brushing, dipping, or spraying, or a combination.


Once the glaze is applied, it is loaded for the second firing - Glaze firing. This is our highest temperature firing - getting as hot as 2269 degrees. This firing takes up to 36 hours to complete. At any given point in the production process, a piece can crack or warp, but most of the problems occur during this firing. Cracking, warping, discoloration, large iron specks (some amount of specking is natural and beautiful), or strange striations that existed in the clay color and usually don’t show up until after this firing - these are all some of the problems that can occur at this step.

The third major step in the production of a C bowl is Golding. Each of these thimble size bottles costs around $45. The gold is mixed with a dye and after firing, the red turns to a bright, yellow 22k gold luster color. We paint it on in two coats, letting the first coat dry completely before applying the second coat.


After Golding is complete, it is loaded into the kiln for a third and final firing. This firing usually only takes 12-18 hours to complete. Unloading the gold firing is SO fun and I always liken it to Christmas morning. It never gets old.

After it comes out of the kiln, it is thoroughly inspected for any imperfections, is lightly sanded to remove any kiln shelf residue and to reveal the buttery smoothness of our porcelanic white stoneware clay. It is then either tagged for the store or sorted for fulfillment…and off to its future home!

And here it is in all its glory, three to four weeks later! A most perfect size C bowl in our French blue glaze out, and white glaze in. Shop our restock on Friday and bring one of these beauties home! www.shopsusangordonpottery.com.